How to Hang a Pegboard Securely on Drywall, Concrete, or Tile

If you’re unsure how to mount your pegboard neatly and securely, this guide walks you through the basic tools and a step-by-step installation process.

Table of Contents
Pegboards are one of the easiest ways to add flexible storage and switch up your setup style at home, whether you’re organizing small tools, displaying everyday essentials, or keeping clutter off your surfaces. If you’re unsure how to mount your pegboard neatly and securely, this guide walks you through the basic tools, common mounting styles, and a step-by-step installation process.
Tools You’ll Need
Pegboard
The pegboard you plan to install.
Tape measure
Use it to decide the mounting height, spacing, and alignment.
Level
Helps you keep the board straight and aligned with nearby lines or furniture edges.
Painter’s tape
Stick a strip just below your drilling point to catch dust as you drill.
Wall anchors (the ones in your pegboard kit)
Use the included anchors when they match your wall type and screw size; they’re typically chosen to fit the kit’s hardware.
Screwdriver (or a drill with a driver bit)
For driving screws during installation.
Pencil
For marking drill points and reference lines.
Drill kit
You may need to drill holes before installing anchors.
Furring strips / wooden battens (optional)
If your pegboard doesn’t come with spacers or a built-in mounting system, wooden strips can create the gap you need behind the board. You can usually find them at a local hardware store, Lowe’s, a lumber yard, or online.
Common Pegboard Mounting Styles
Most wall-mounted pegboards fall into one of these setups:
1) Furring strips / standoffs + screws into the wall
First, mount wooden strips (or standoffs) to the wall to create a simple frame. Then you screw the pegboard onto that frame.
2) A mounting rail / wall rail system
This is common for home-use pegboards. The kit usually includes rails or mounting strips. Instead of pressing the board directly against the wall, you install the rails first, then hang or screw the pegboard onto the rail system.
3) Metal pegboards with dedicated brackets + spacers
The pegboard doesn’t sit flush against the wall. Instead, brackets and spacers hold it off the wall, and screws lock the whole system in place. This creates a consistent gap and keeps the board rigid under load.
Why the Gap Behind a Pegboard Matters?
No matter which method you use, they all share one important idea: the board should not be installed tight against the wall. The gap behind the board gives hooks and accessories room to seat properly. Without that clearance, many hooks will hit the wall and won’t lock in place or feel stable.
Step-by-Step: How to Install a Pegboard
1) Pick the right spot
Before measuring, look around, make sure the pegboard won’t block door swings, cabinet doors, or nearby furniture. Once you’ve found a good spot, measure the height and mark your alignment. A tape measure and pencil will make this part easier.
2) Match your wall with the right fasteners
Drywall / hollow walls: There’s often wood or metal framing behind the drywall (studs). Use a stud finder to locate them, then drive screws into the studs whenever possible, this gives you the strongest, most secure hold..
Concrete / brick: Use a masonry drill bit, drill the holes, clean out the dust, then install wall anchors or expansion hardware before mounting.
Tile walls: Use the correct bit and drill at a slow speed to reduce the risk of cracking or chipping the tile.
3) Mark a level line and drill points
Use a level to draw a straight reference line. Then hold the pegboard (or its rail/bracket) in place and mark the drill points. Take a moment to double-check everything, fixing misaligned holes later is much harder.
4) Drill, clean the holes, and install anchors
Before drilling, place painter’s tape below the drill point to catch dust. After drilling, clean out the holes, especially for concrete walls. Any dust left inside the hole can weaken how well anchors grip.
5) Install the back structure first, then the pegboard
If your kit uses rails or brackets, mount those to the wall first., Then mount the pegboard and tighten everything. If you’re using furring strips/standoffs, secure that spacer structure first, then screw the board in place.
6) Test stability before loading it up
Give the board a gentle pull and a light side-to-side shake. If it feels solid, start hanging items gradually. Loading everything all at once makes it harder to tell if something’s off.
How to Hang a Dezctop Pegboard (D-Board for Wall Mount) on the Wall?
Confirm the orientation
Check the “UP” direction on the panels and decide the height and position on your wall.
Use the board to plan placement and mark reference points
Hold the D-Board against the wall to confirm the installation area. Use the two upper holes as reference points to mark where the support brackets will go.
Install the support brackets
Choose the right mounting method based on your wall type (wood vs. concrete/brick). Mark the points on the same level line so the left and right bracket sets match in height. If any drilled points are slightly off, adjust the bracket position to correct the spacing.
Assemble the connection brackets and column supports
Attach the connection brackets and column supports to the back of the panels. This creates the necessary structure to connect both boards and provides proper clearance from the wall.
Mount the D-Board and finish with screw caps
Align the panels with the installed support brackets, tighten all screws, then apply the screw caps for a clean, finished look.
FAQ
How do I hang a pegboard on a door?
Use over-the-door hooks to carry the weight. Hang the pegboard from the top support, then use anti-slip pads or small adhesive points at the bottom to reduce side-to-side movement. This approach works best for light storage. You can also buy an “over-the-door pegboard” designed for this use.
How to hang a pegboard on a concrete wall?
Drill to the required depth, vacuum dust from the hole, blow into the hole to loosen deeper dust, then vacuum again. Once the hole is clean, install anchors or expansion hardware and mount the pegboard.
How do I mount a pegboard without drilling?
If the wall is smooth, clean, and solid (not chalky or flaking), you can use heavy-duty removable adhesive strips and spread the load across multiple points. Follow the product’s curing time before hanging anything, and avoid heavy items to reduce the risk of the board falling later.
You can also use adhesive mounting pads, but keep in mind that wallpaper, rough walls, damp surfaces, and powdery paint reduce bonding strength. Check in advance whether removal will leave marks.
A third option is a floor-to-ceiling tension-frame pegboard stand. It can handle more weight, but the vertical supports will remain visible.
How do I mount a pegboard on drywall?
The key is locating the studs with a stud finder and driving screws into the studs so the board stays stable under load.
If You Just Want More Desk Storage
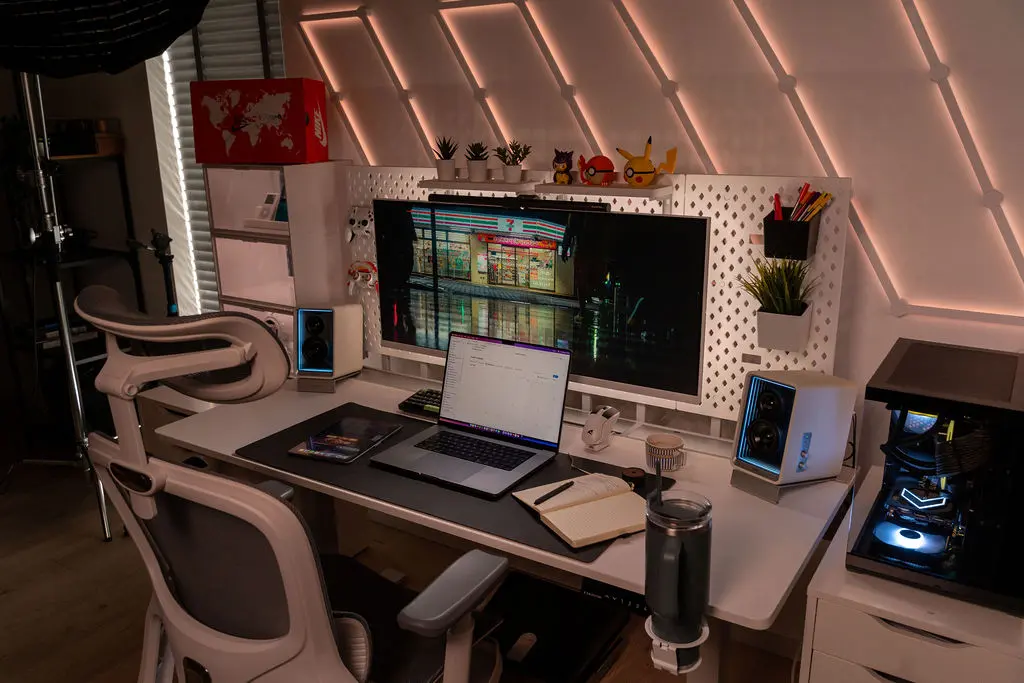
If all of the above feels like too much work and your goal is simply to add storage near your workspace, Dezctop also offers a desktop pegboard option. With Dezctop Bifrost 160 Elite/Pro, you can pair a matching desk pegboard with modular accessories to keep headphones, controllers, cables, notes, and chargers within easy reach, while leaving your main surface clear for your keyboard and mouse.
You may also like:
Tag






Dezctop